The art of sublimation on wood has become a captivating method for creating personalized and visually stunning items. In this blog post, we’ll explore various techniques, from working with bare wood to using specific coatings, providing you with insights and tips to master the craft of sublimating on wood.
Understanding Sublimation on Wood
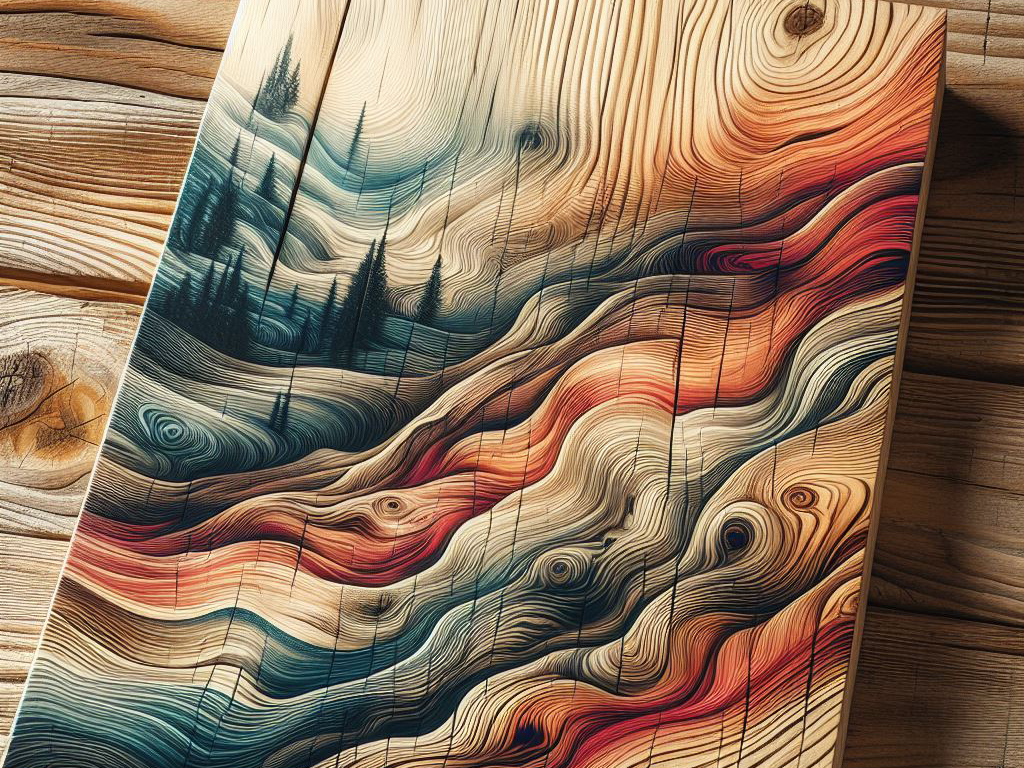
Sublimation is a printing technique that involves transferring a design or image onto a substrate using heat and pressure. While it is commonly associated with fabrics and ceramics, sublimation on wood has gained attention for its ability to bring out the natural beauty of the material. Wood, with its unique grain patterns and textures, adds an organic and rustic charm to the finished products.
Bare Wood With No Coating
One approach to sublimation on wood involves working directly with bare wood, embracing its natural characteristics. This technique allows the wood’s grain and texture to become an integral part of the design. To achieve successful results, ensure the wood surface is clean, sanded, and free of any coatings or finishes. The ink penetrates the wood fibers, creating a unique and rustic aesthetic.
Thermal Laminating Wood for Sublimation
Thermal laminating involves applying a heat-activated adhesive film to the wood surface before sublimation. This method provides a smooth and even base for the sublimation process, enhancing color vibrancy and image clarity. It’s crucial to carefully apply the laminating film to avoid bubbles or wrinkles that may affect the final result. Once laminated, the wood is ready for the sublimation transfer, ensuring a professional and polished finish.
Using Polycrylic to Sublimate on Wood
Polycrylic, a clear water-based finish, serves as an excellent medium for sublimation on wood. Applying a thin, even coat of Polycrylic to the wood creates a receptive surface for sublimation ink. This method not only enhances color brilliance but also provides a protective layer, ensuring the longevity of the design. Allow the Polycrylic to fully cure before proceeding with the sublimation process.
Sanding Sealer
Sanding sealer is another option for preparing wood for sublimation. Applying a sanding sealer helps seal the wood pores, creating a smoother surface for the sublimation transfer. It minimizes ink absorption into the wood, allowing for sharper and more vibrant prints. After applying the sanding sealer, ensure the wood is thoroughly dried and sanded before proceeding with sublimation.
Tips for Making Your Own Sublimation Wood Blanks
Creating your own sublimation wood blanks opens up endless possibilities for customization. Here are some essential tips to consider:
Wood Selection: Choose a quality wood type with a smooth surface and minimal imperfections for optimal results.
Surface Preparation: Thoroughly clean and sand the wood surface to ensure proper ink adhesion.
Temperature and Pressure: Follow the recommended temperature and pressure settings for your heat press to achieve consistent and vibrant sublimation results.
Design Considerations: Adjust your designs to complement the natural characteristics of the wood, allowing its beauty to shine through.
Conclusion
Embarking on the journey of sublimation on wood opens the door to endless creative possibilities. Whether you prefer the raw charm of bare wood or opt for coated surfaces, these techniques and tips will empower you to master the art of sublimating on wood, creating personalized and visually stunning pieces that showcase the unique beauty of this natural material.